Portfolio
Hello! My name is Jeremy Tabor. I am a Character Modeler with experience in the Games, Film, and Medical industries.
I’m always interested in exciting new opportunities and challenges, so drop me a line so we can discuss how I can help out with your project!
Résumé: PDF / Word
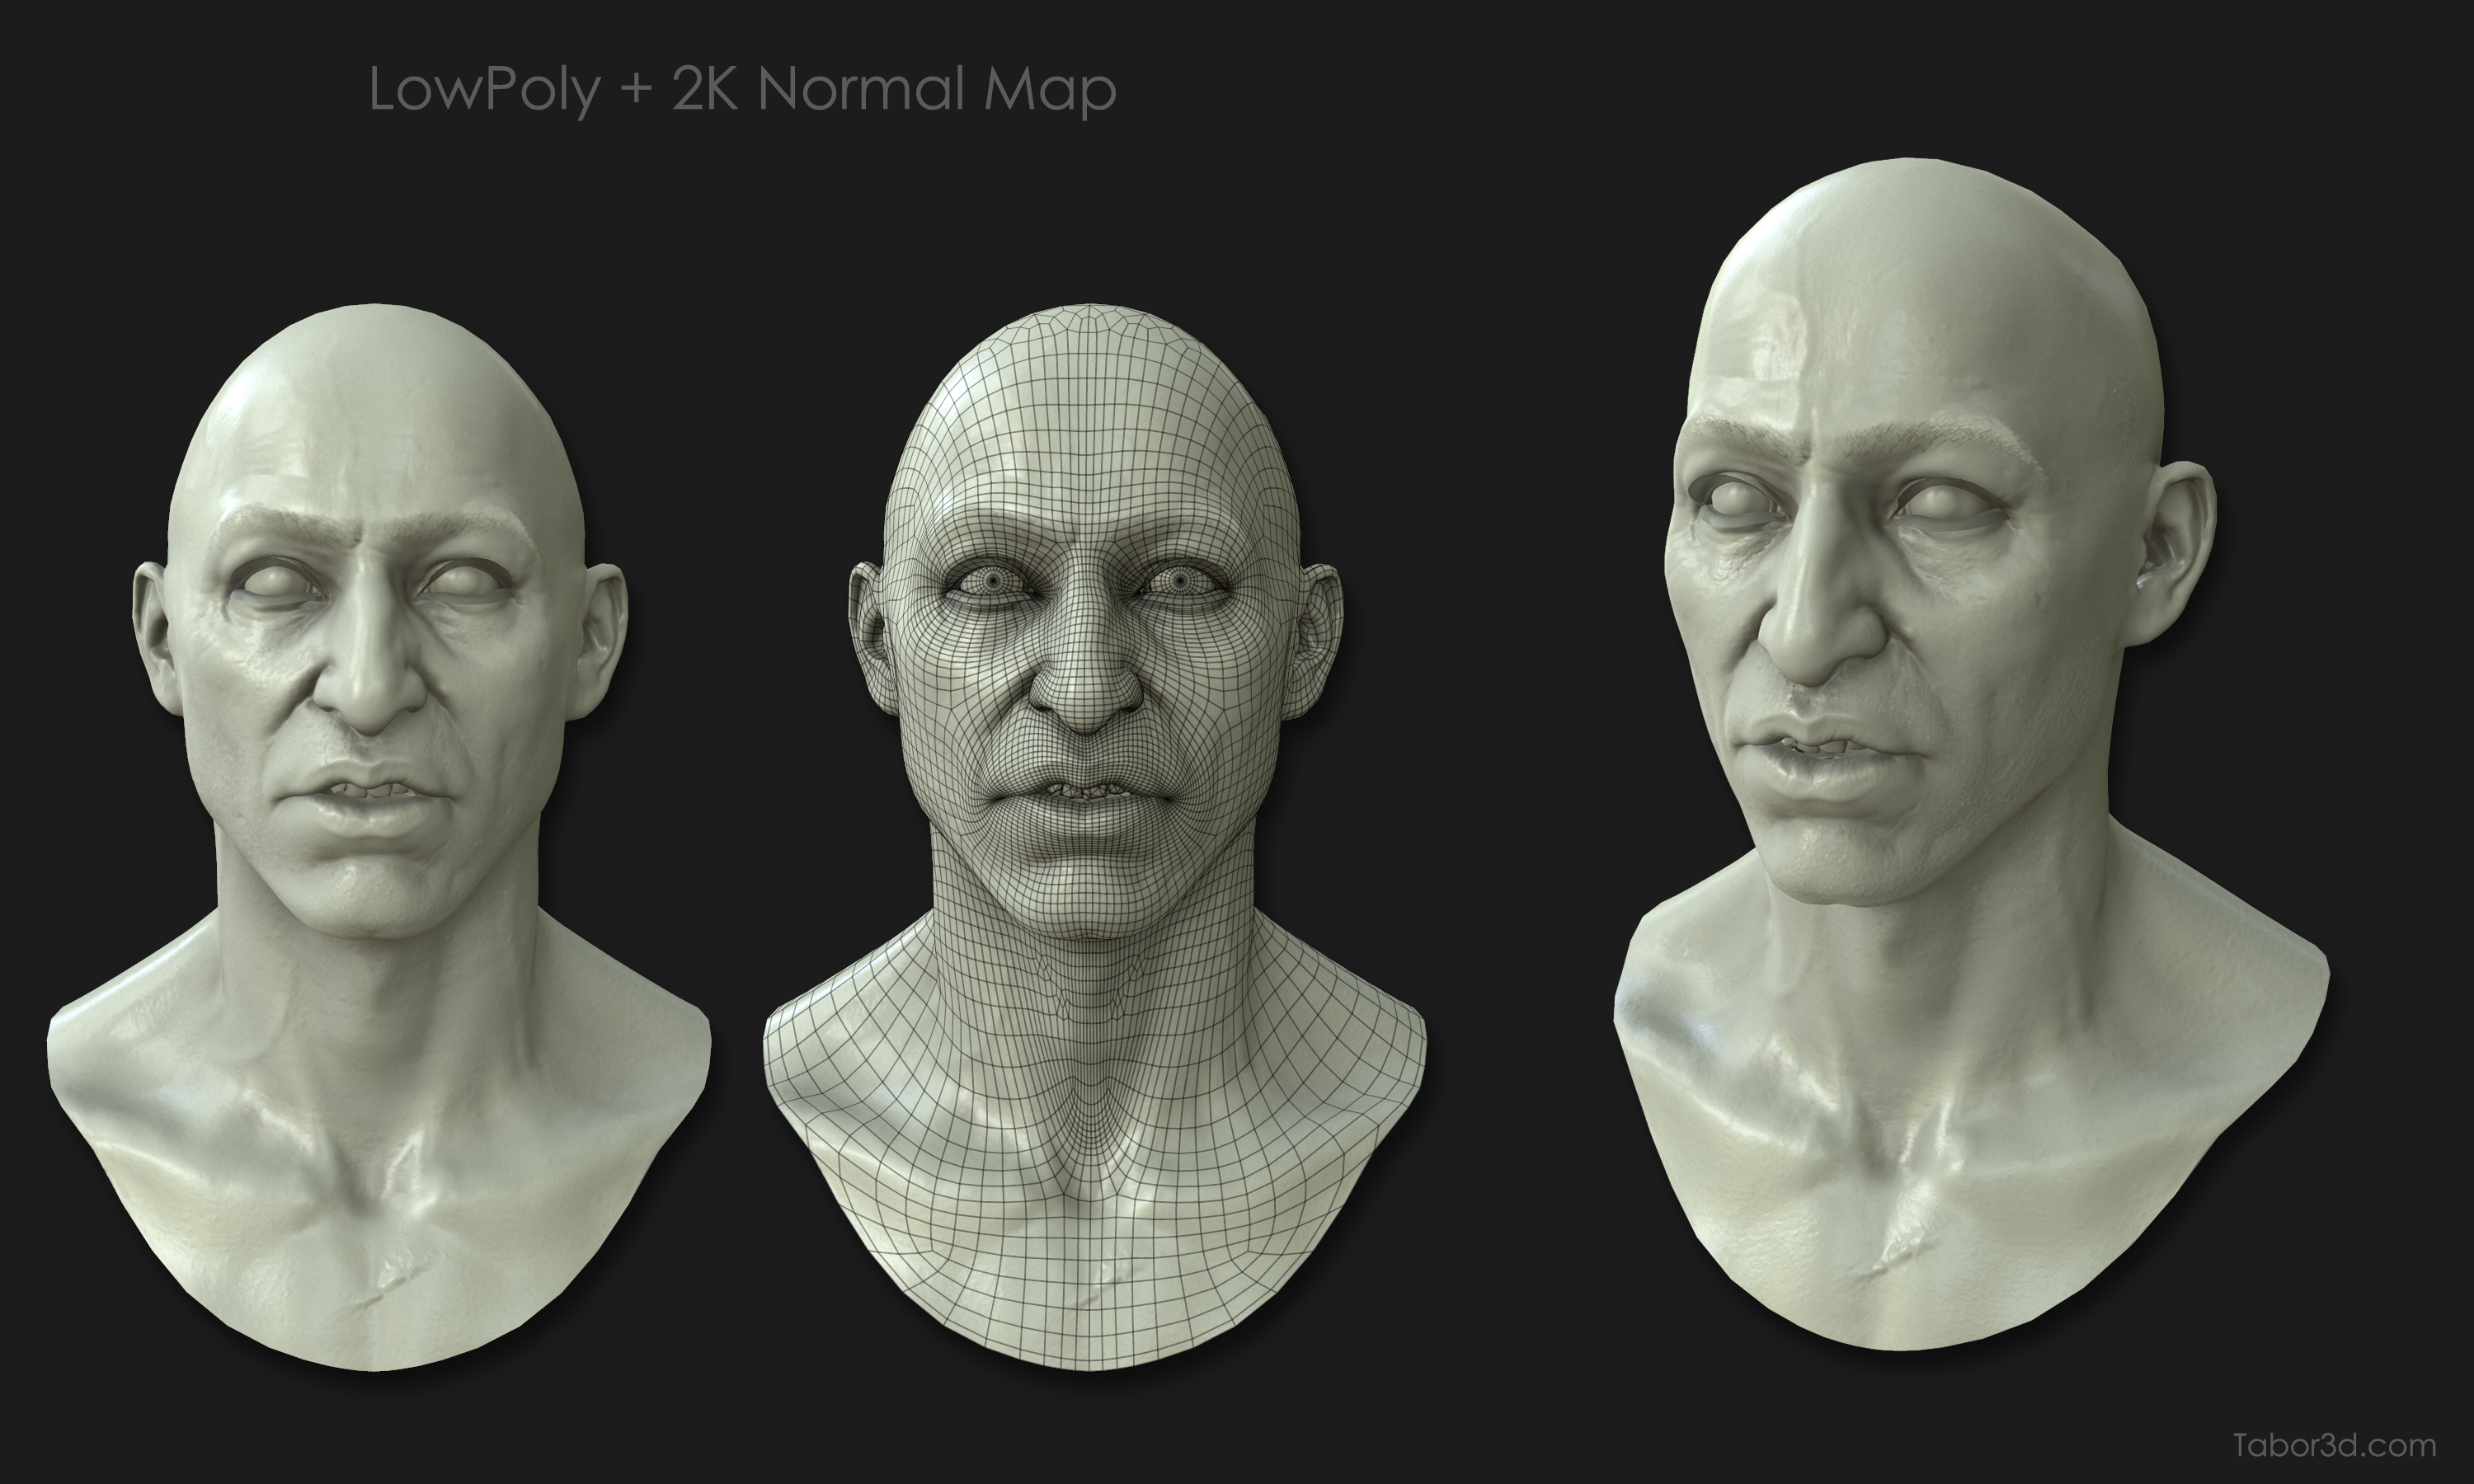
Sony VASG
While at VASG, I was fortunate enough to have the opportunity to focus exclusively on photo-realistic human heads. It was a fun challenge, and I enjoyed the high level of scrutiny that comes with working in this department. The following images are a sample of the type of Modeling, Texturing, and Blendshape work I’ve done.
For the Ghost of Tsushima trailer, I modeled and textured realtime faces, as well as authored blendshapes for each character shown in this trailer.
I had the privilege of working on both of the trailers for Death Stranding. I contributed to the model and texture for the heads of Norman Reedus, Mads Mikkelsen, and Guillermo Del Toro.
Real-time Models
El Portero

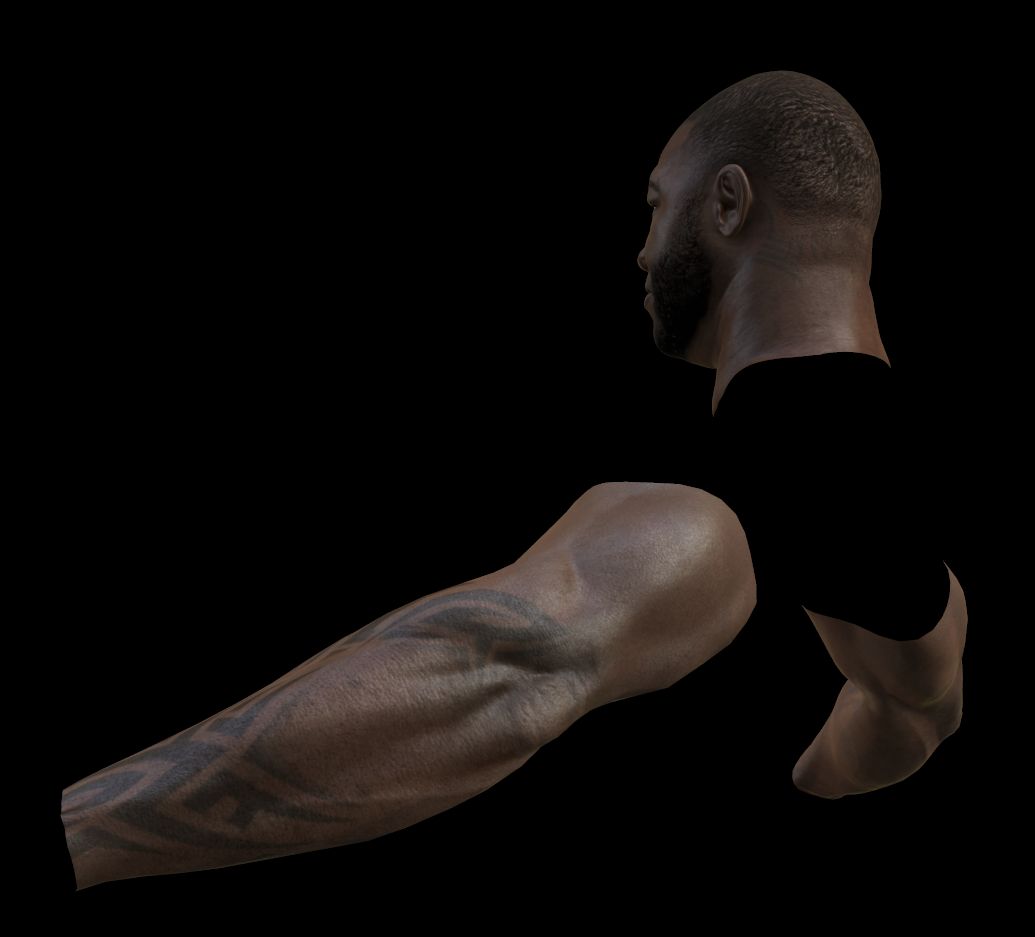
David Ortiz
On this model, I was responsible for the Skin textures, Shader work, Arm Sculpt, Base Body and Pose, and Cloth Sim. Modeled in Maya,Zbrush, and Marvelous Designer. Textured in Mari. Real-time Rendered in Marmoset. Materials are physically-Based.


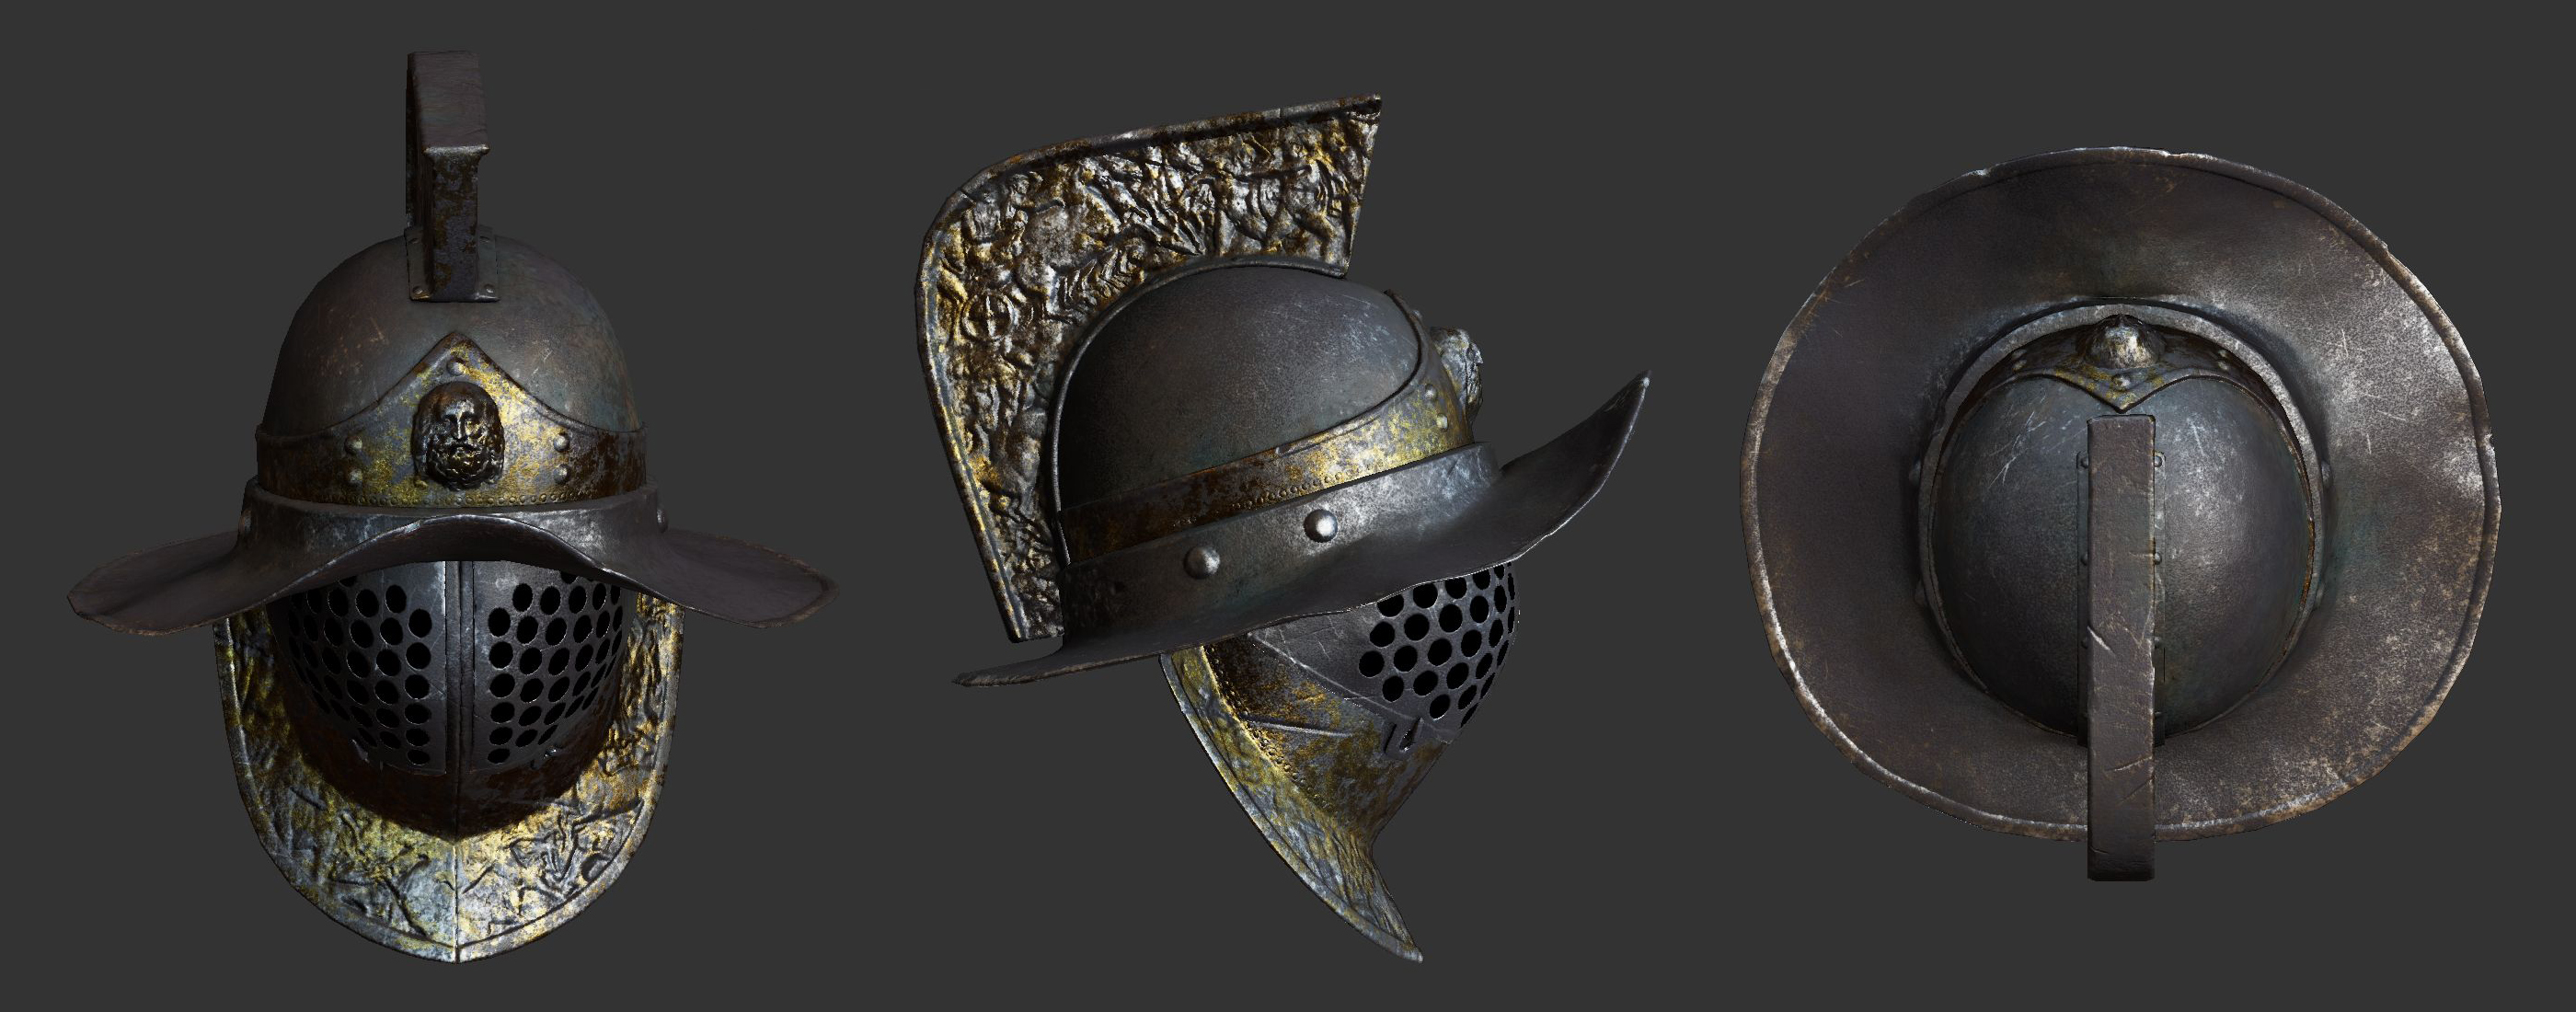
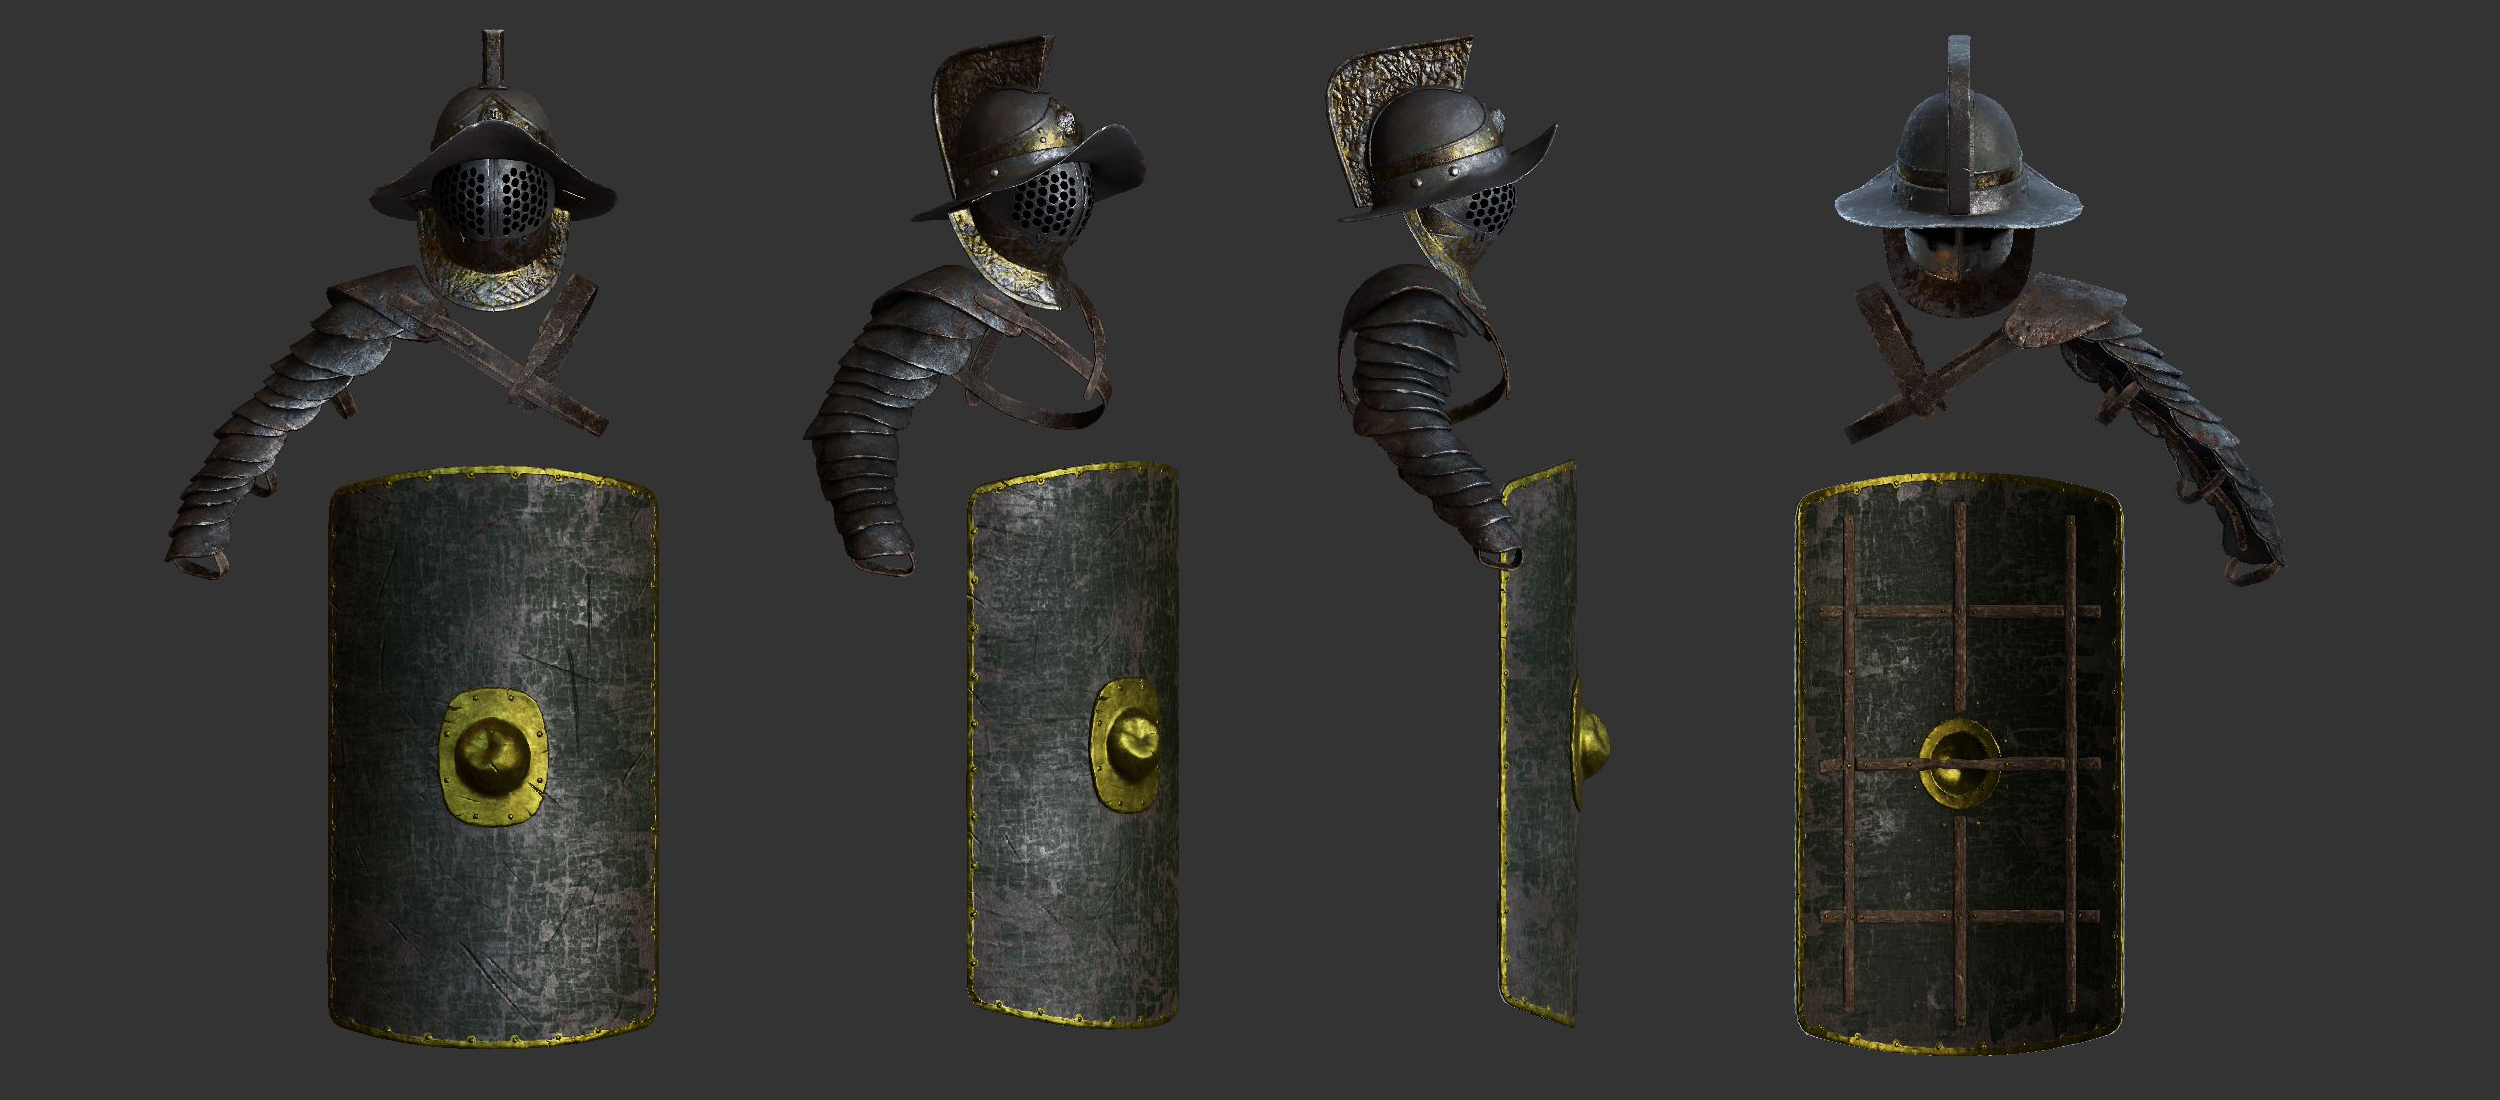
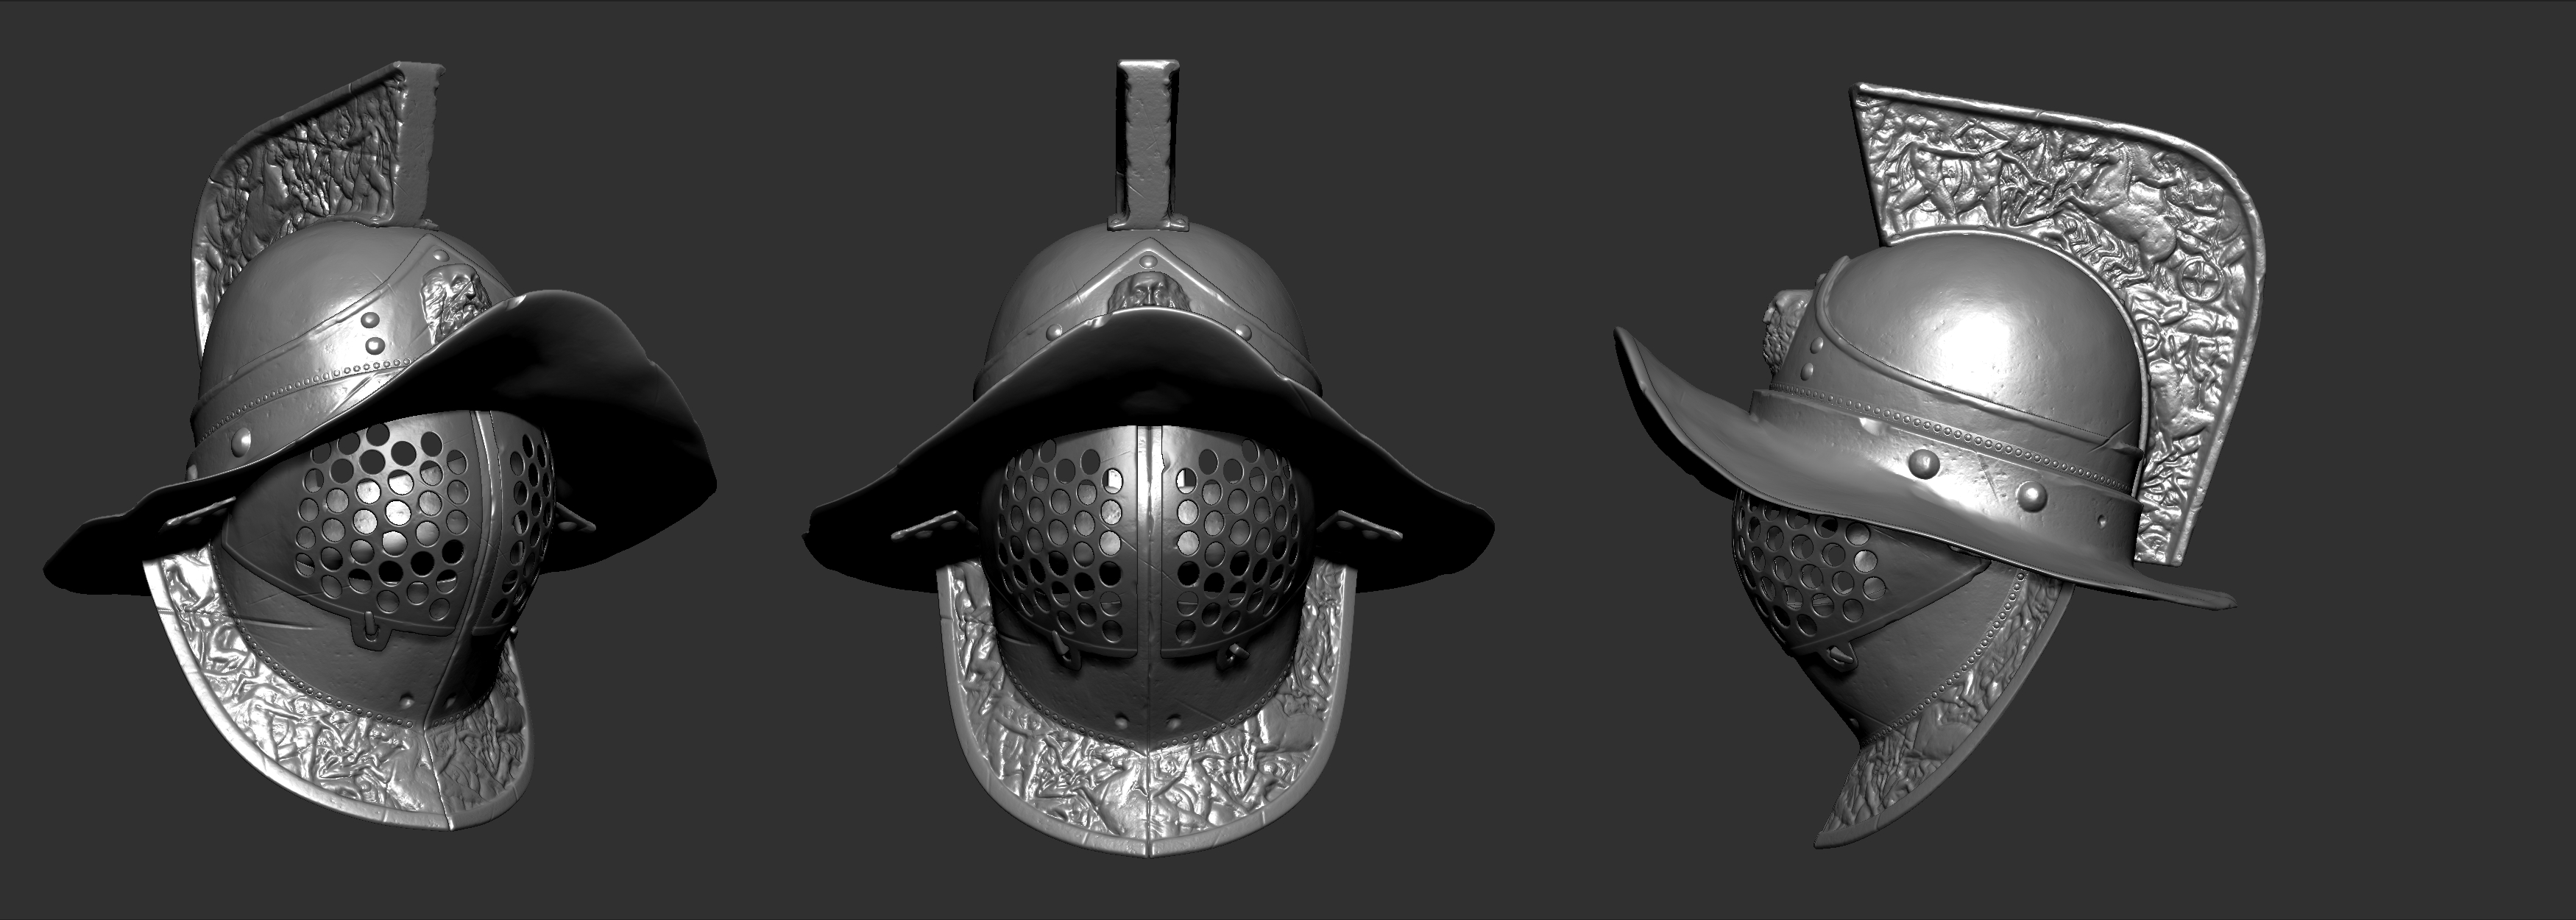
Murmillo
Realtime assets of a Murmillo-Class Roman Gladiator. Modeled in Maya and Zbrush, Textured in Mari. Materials are physically-Based.

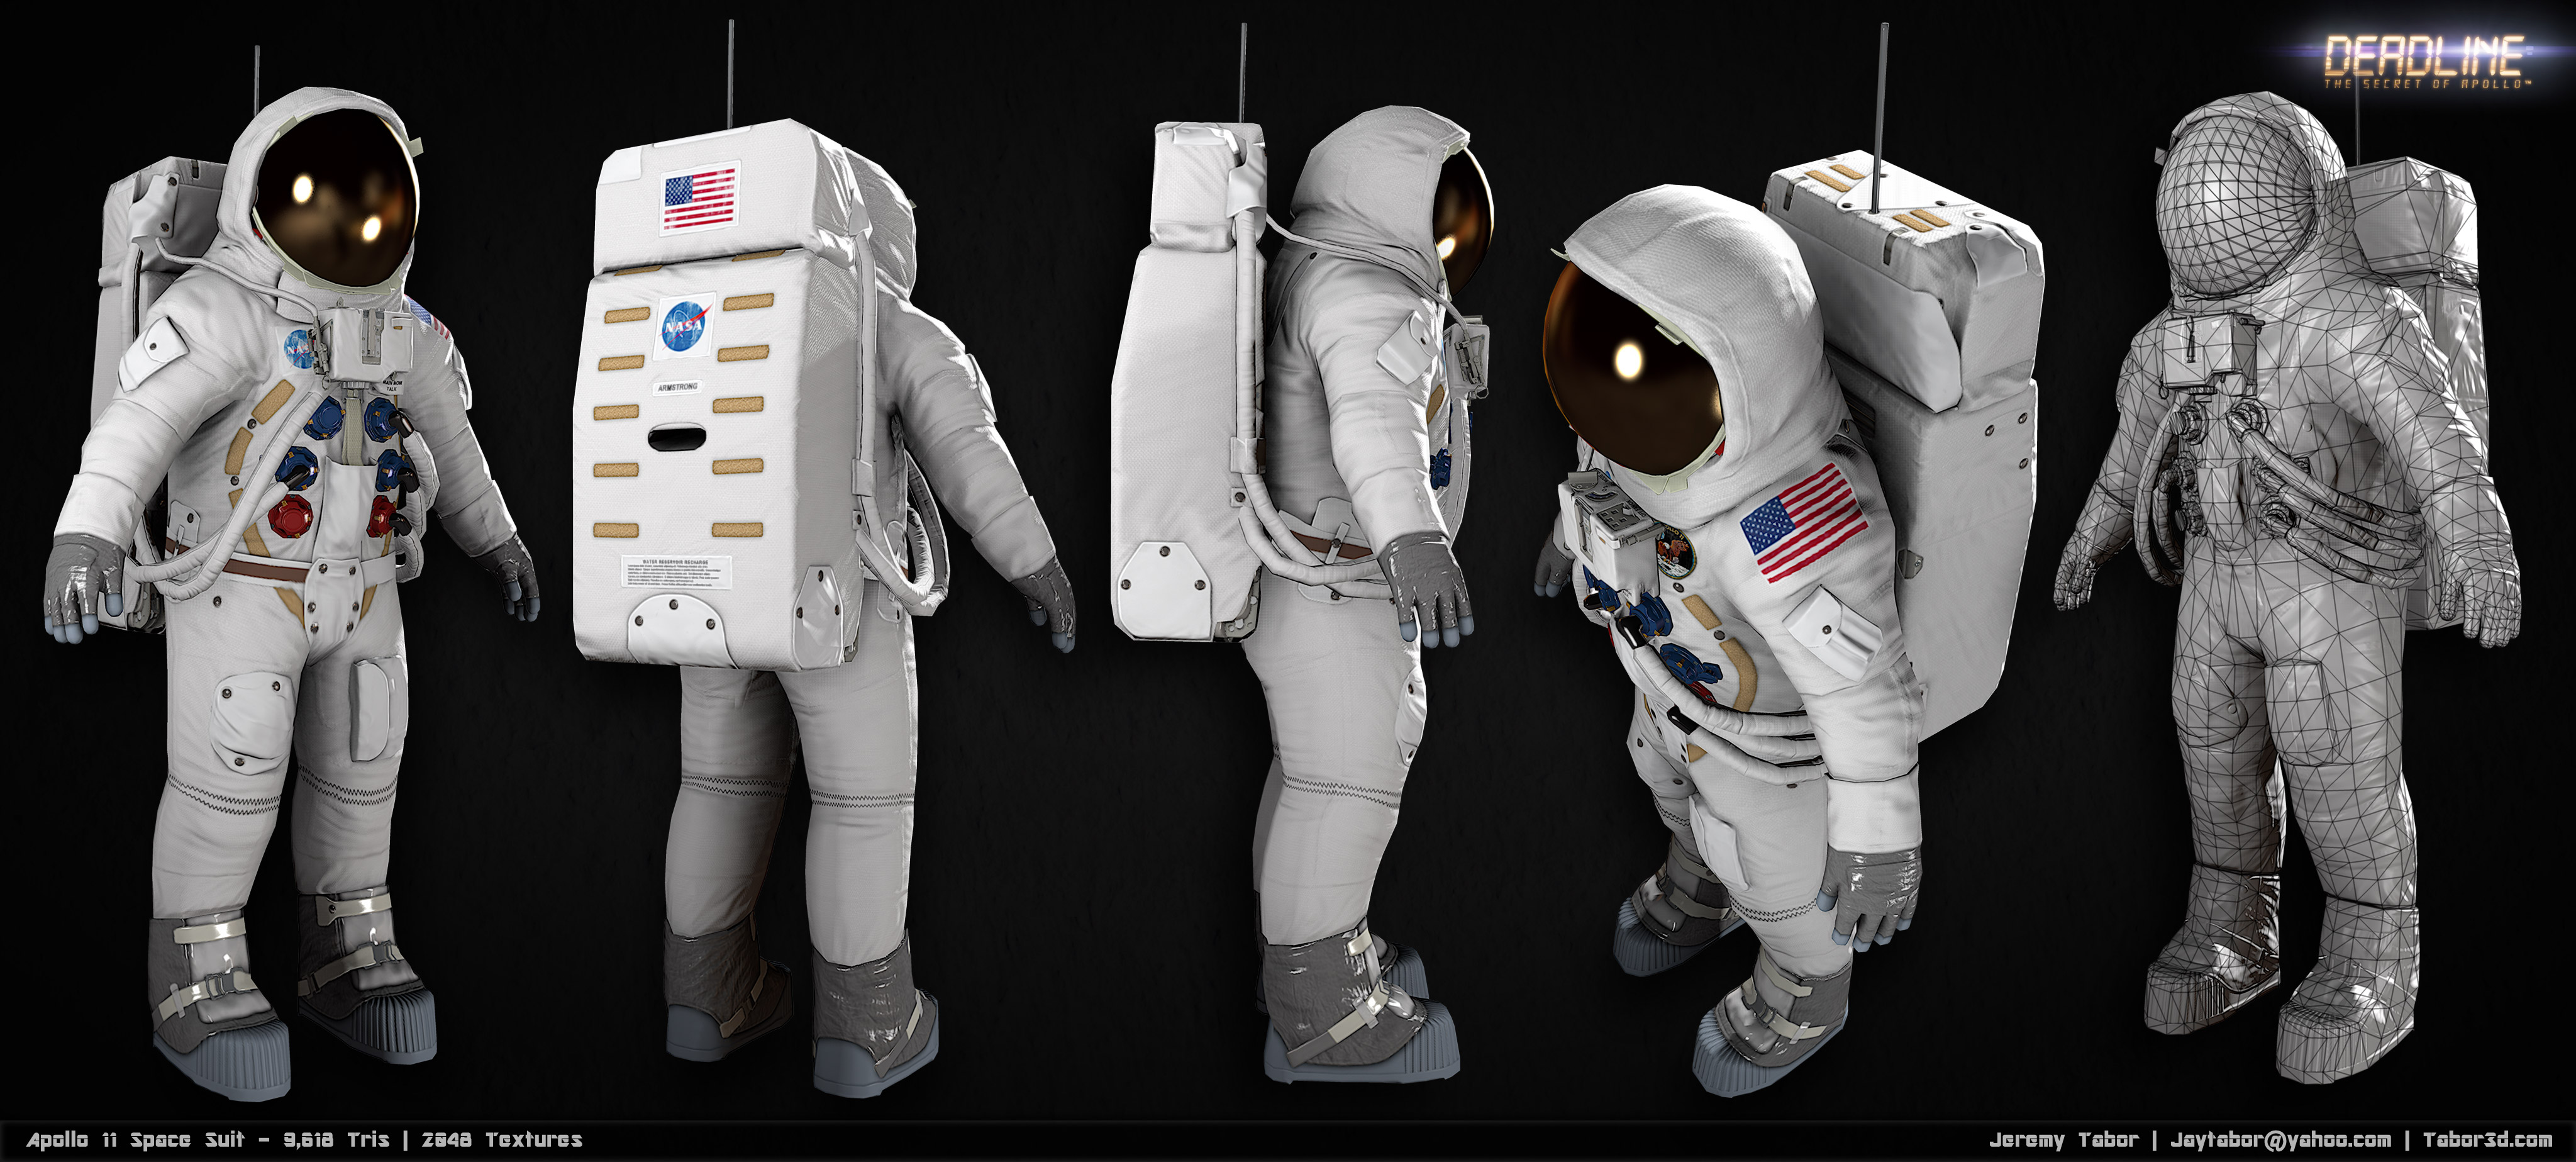
Apollo 11 Suit
Modeled in 3ds Max and Zbrush. Textured in Photoshop. Rendered in Marmoset.


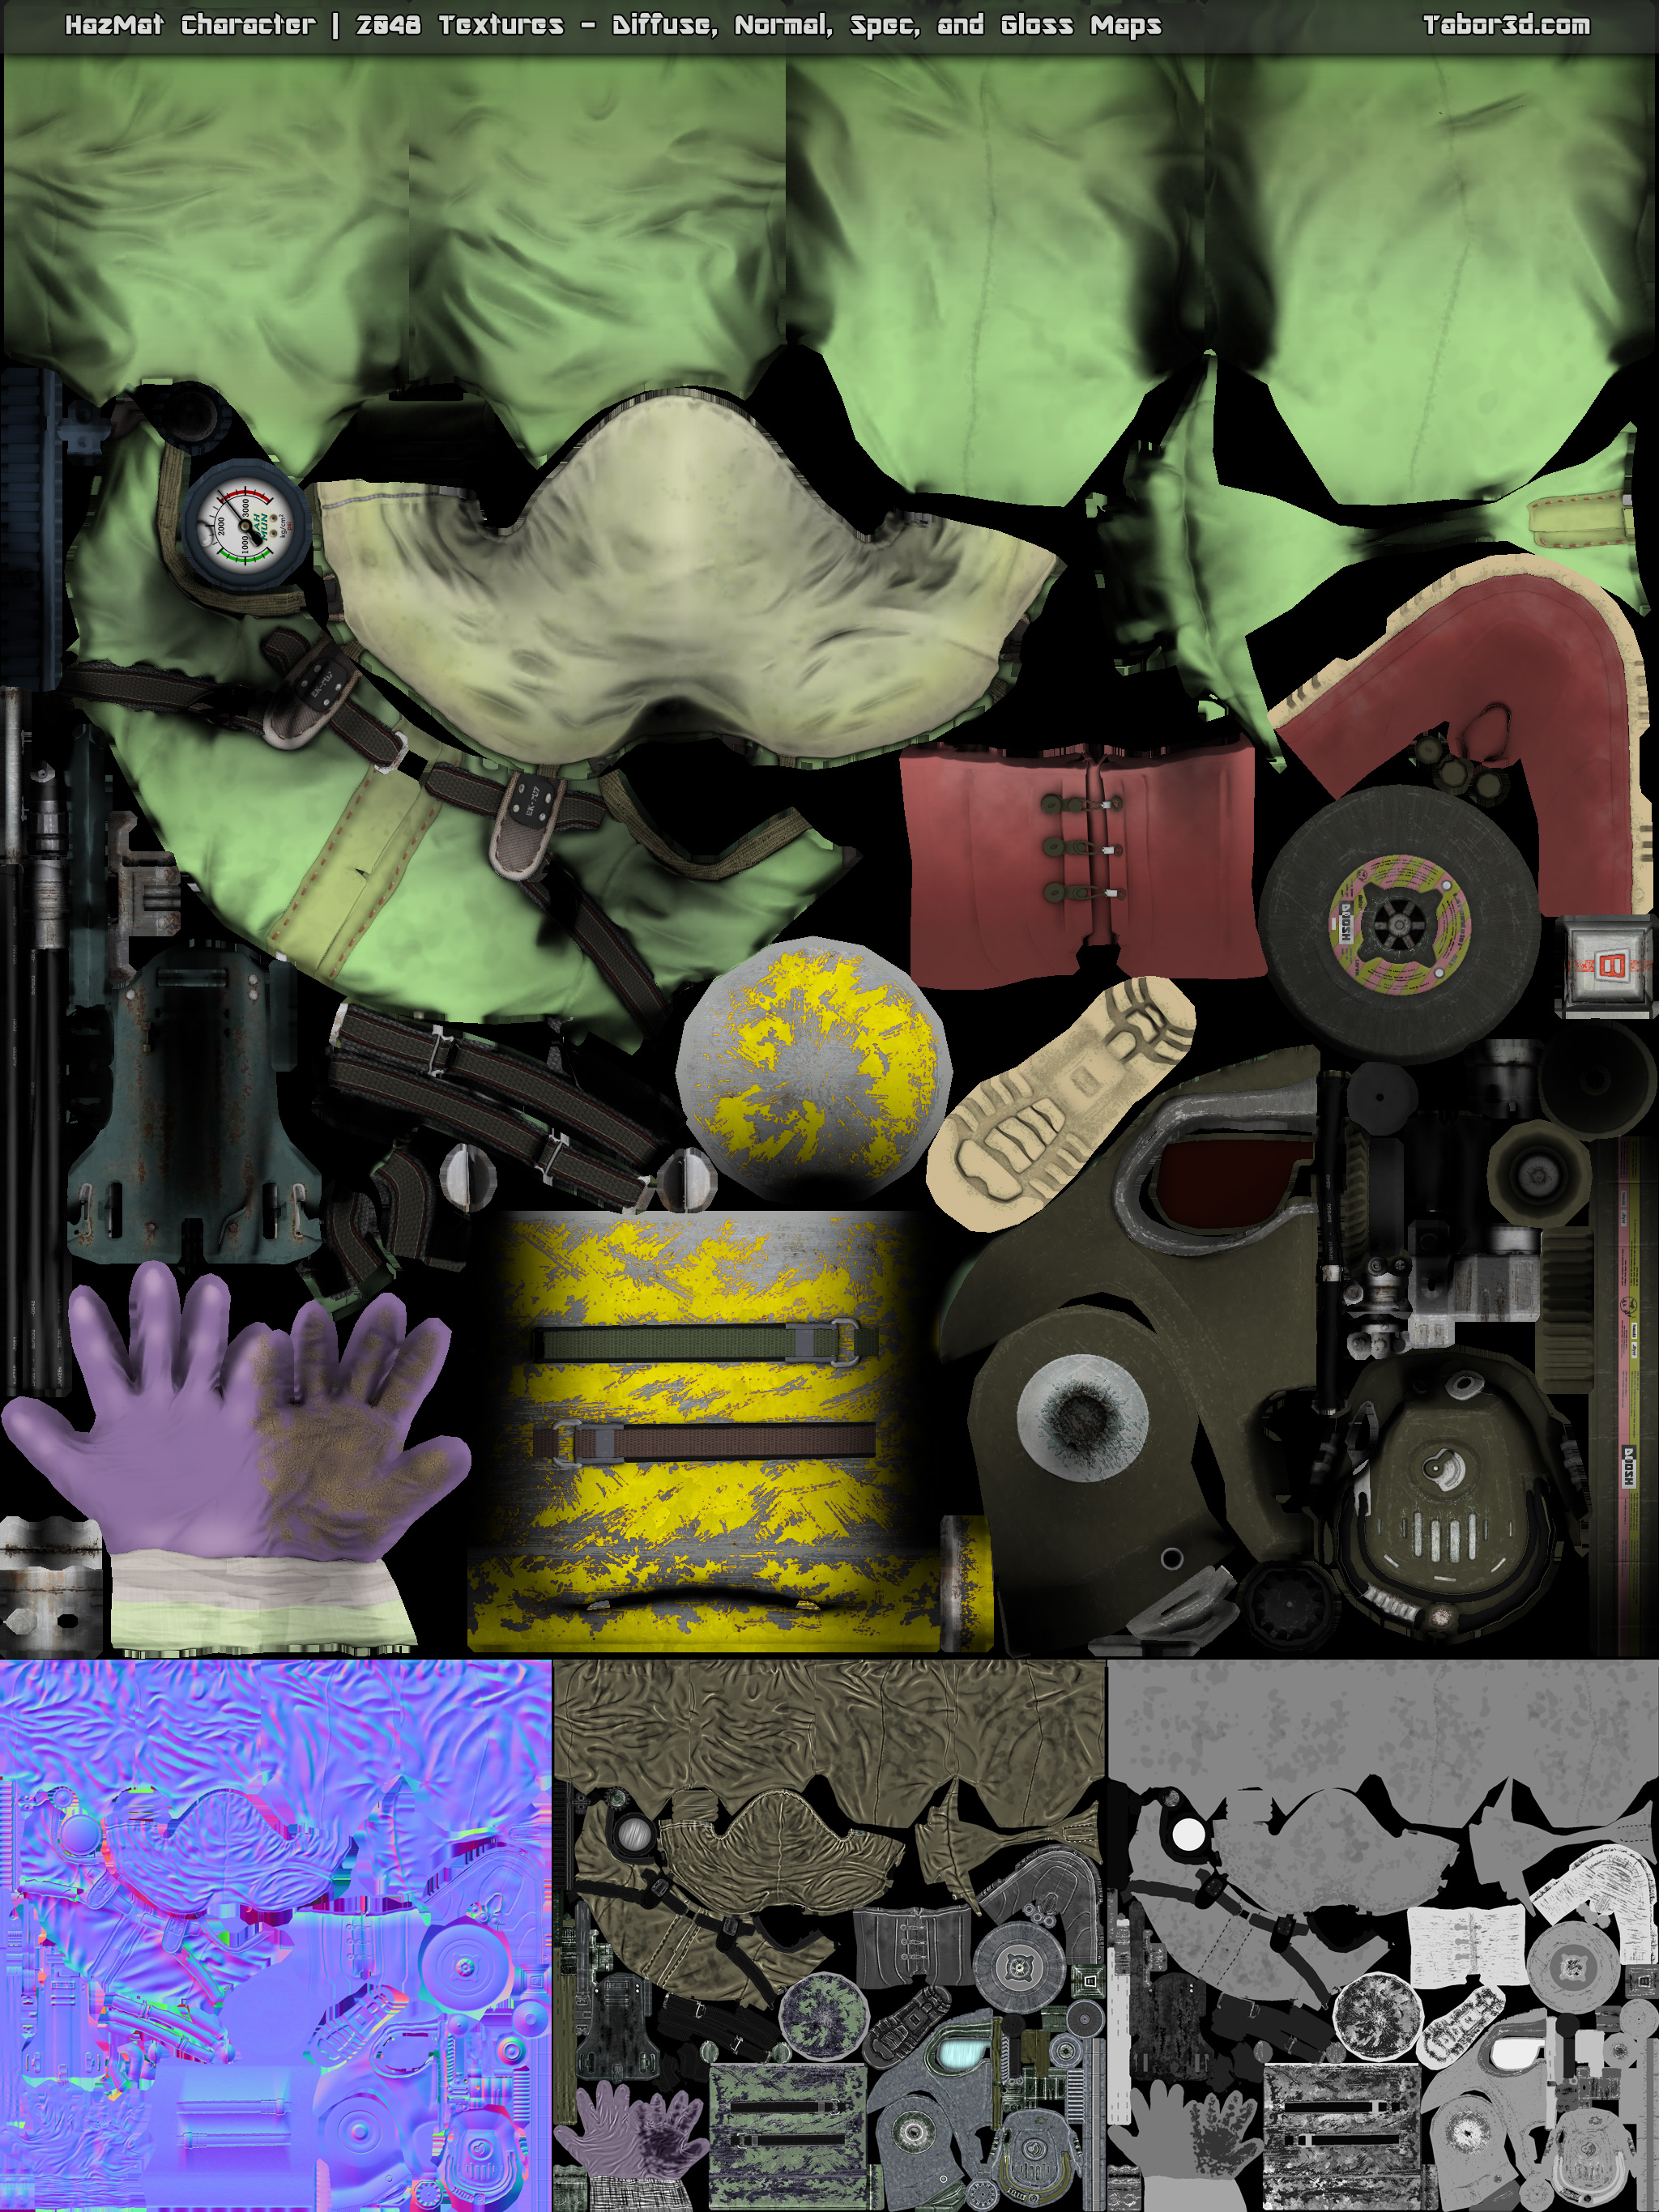
Hazmat

Modeled in 3ds Max and Zbrush. Textured in Photoshop. Rendered in Marmoset.

Texture Work
Seventh son
I contributed textures to various environments and props throughout the movie “Seventh Son.”
The following shots show my primary contribution to the film – The Nabatean Temple environment. I was responsible for texturing and detail sculpting a majority of the buildings, pillars, rubble, etc. The final shots feature a composite of the live action set with the digital set extensions.


In the two shots below, I was responsible for additional detailing of the Bridge, Exterior Wall, and Buttresses.


Stylized Material Fun
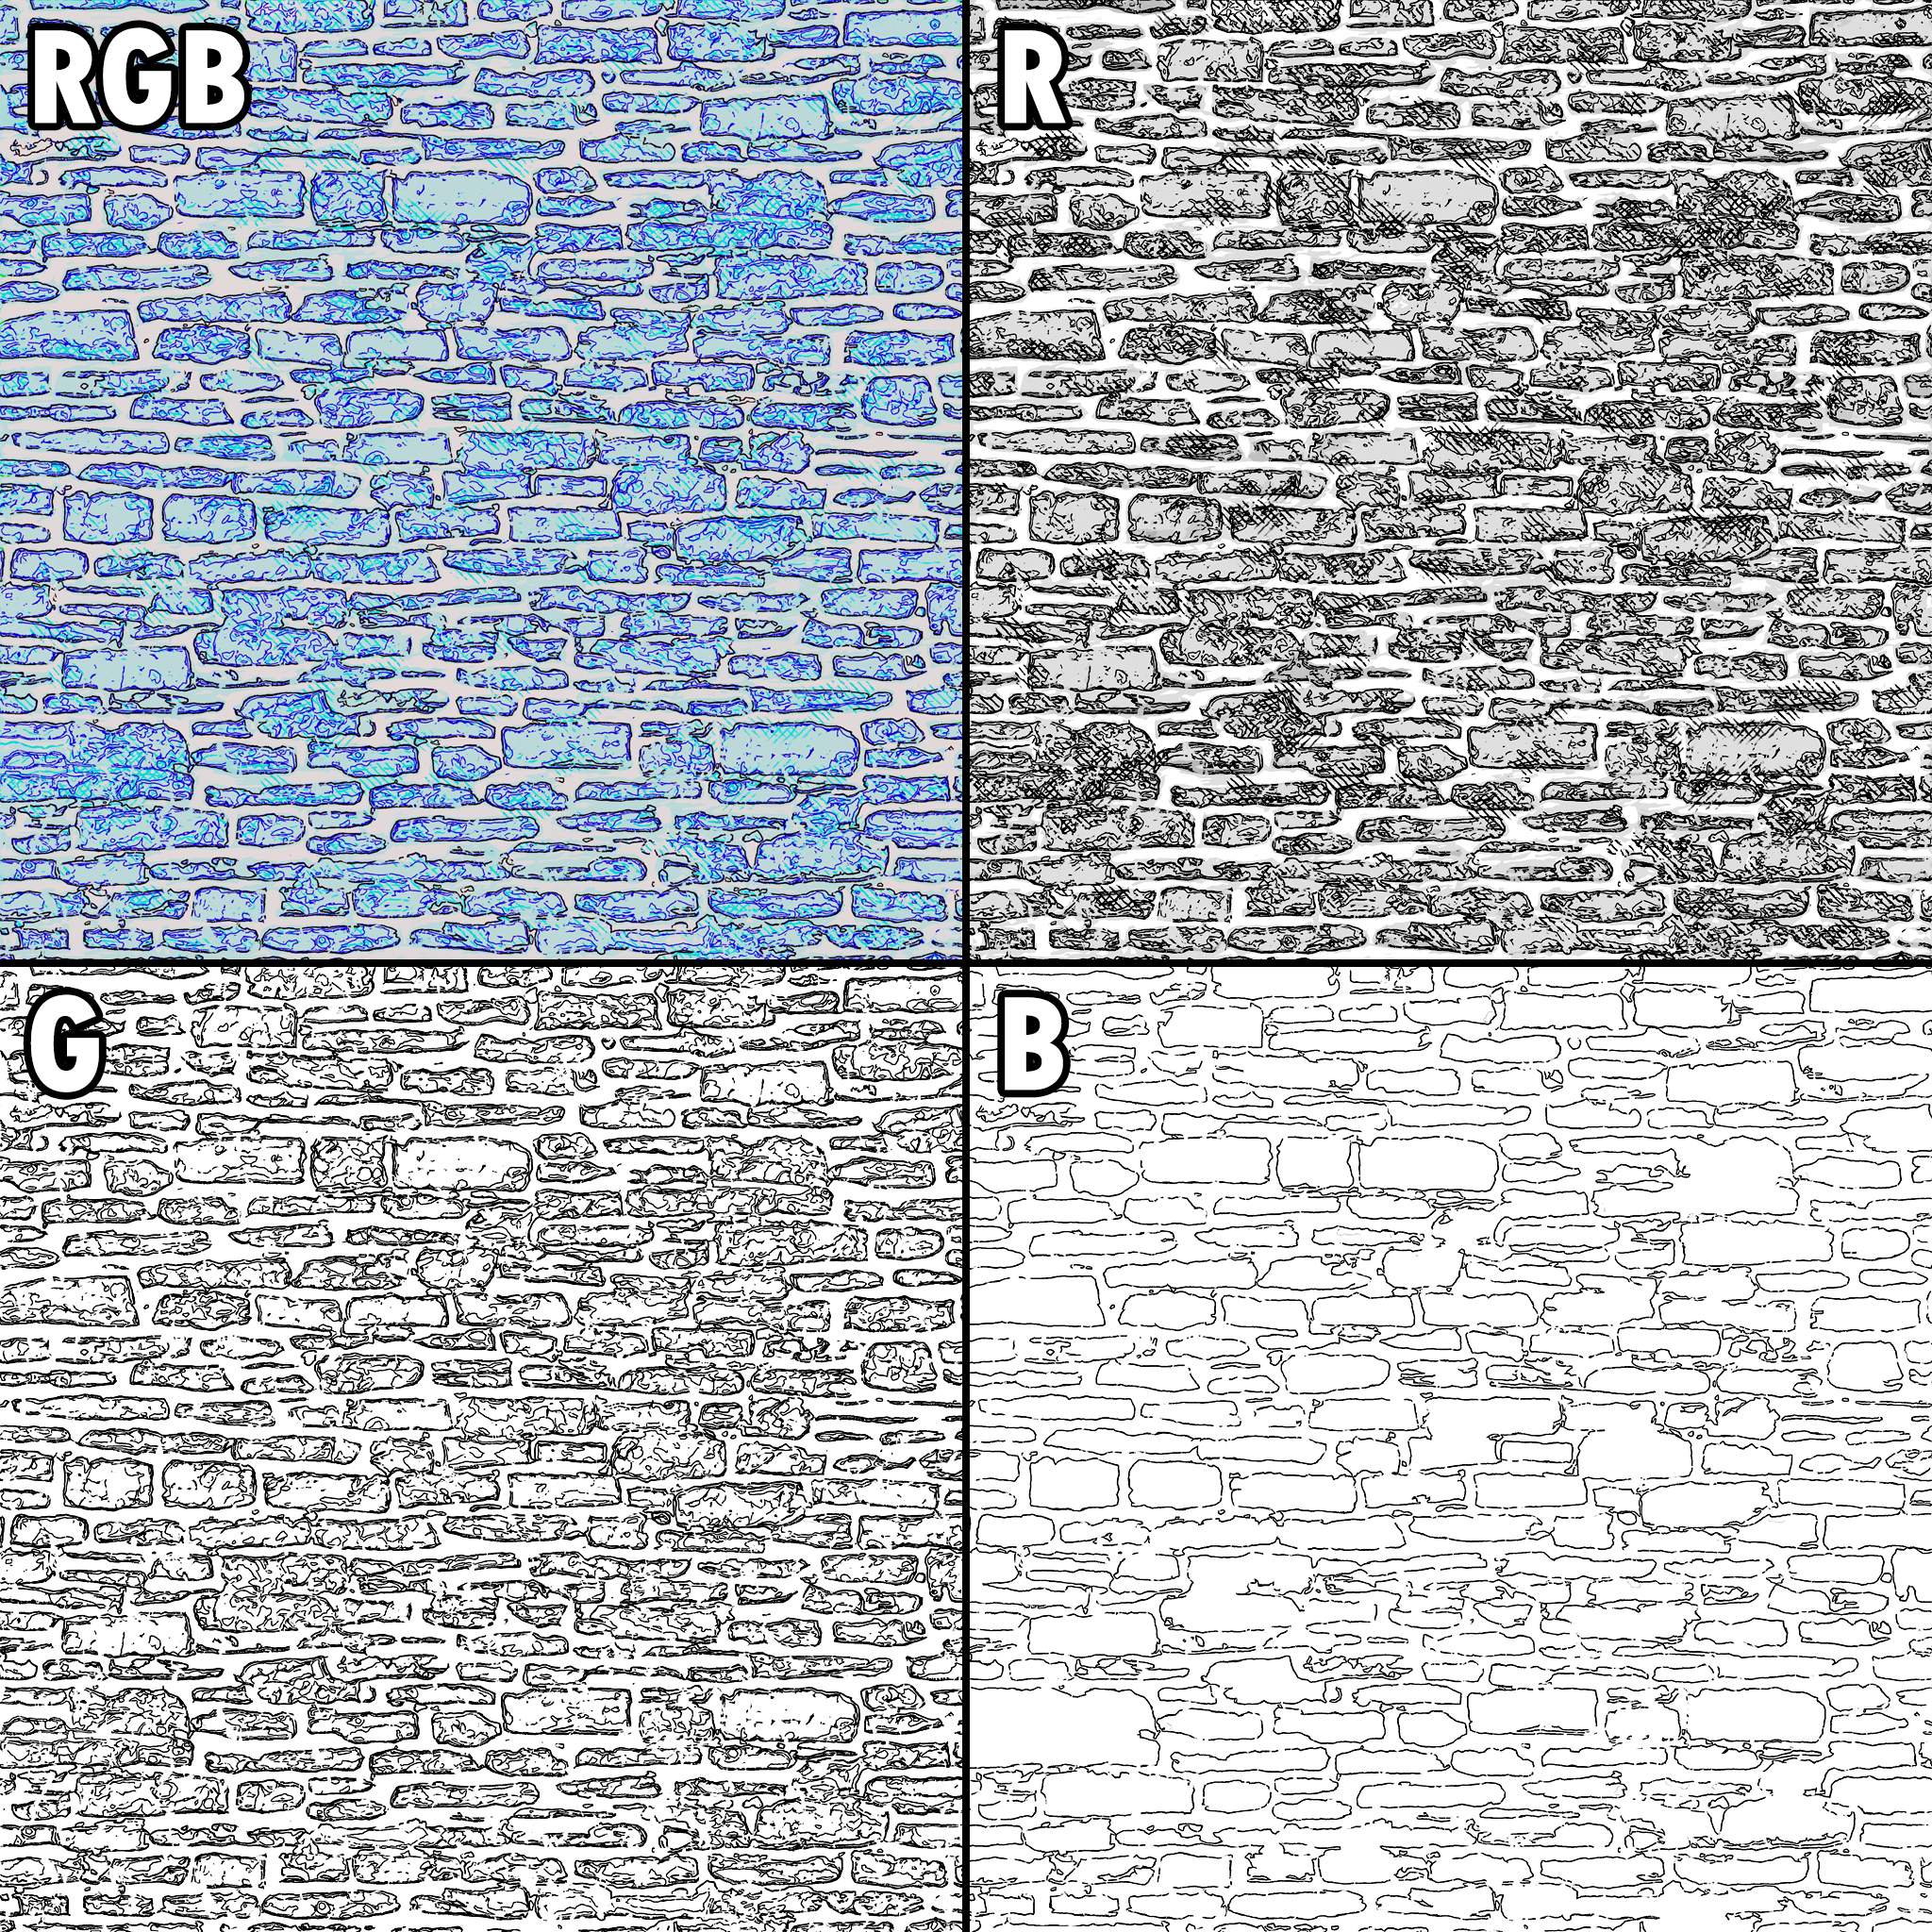
This little experiment was for a prototype in which the gameplay required the player to inspect an environment for clues. So my proposal for the art direction was this impressionistic and more graphic approach with line art and simplified color palettes, which I proposed would help facilitate the central ‘investigation’ mechanic. The prevailing rule being that as the player drew nearer to an object, more intricate line-art and colors would dynamically be exposed on the model, and conversely, as the player moved away from the area the Line Art would fall away and the area would be gradually reduced to more simple swatches of color, relying on silhouette and tonal difference to distinguish the separate elements.
I set up a simple example in Unreal 4 to demonstrate the concept. The brick wall is composed of 5 ‘layers’ which are revealed as the player draws closer to the a section of the geo.

In the shader, the falloff parameters of the layer swapping can be tweaked per object (The falloff is multiplied by a perlin noise so that it appears more organic). So for instance, a designer could opt to have an object of interest reveal it’s most detailed state from further away the the surrounding environment, which could create a point contrast and draw the eye of the player, or vice versa.
The 5 layers of the material are stored in 2 textures and a single color node. The first layer, is the most detailed texture. It contains color, value, and the most intricate lineart of all of the textures.

The next 3 layers used a texture which contained a pattern in each R, G, and B channel of the map, which were multiplied over a color node. So obviously in this case, I have sacrificed hue variance for the sake of storing this all in a single map, but that is OK since the lower layers are supposed to be more simplistic anyway.
With more time, I would have done away with the naturalistic lighting, and come up with a more graphic solution for conveying depth – likely through a hue and value shift based on pixel depth, similar to the set-up I established for the mesh material.
I would also finish an aspect of the post-processing volume which would clamp the shadows and AO in the scene into 3 ranges, which would be replaced by a tiling hatch texture. The darkest shadows would receive a hatch in one direction, and both the mid-tones and darks would receive a hatch in the opposite direction, so that the darks would have a cross hatch and the mid-tones would have a single hatch. This concept is demonstrated in a fixed way in the brick texture and perhaps more clearly in this helmet prop which I used to experiment with this technique:

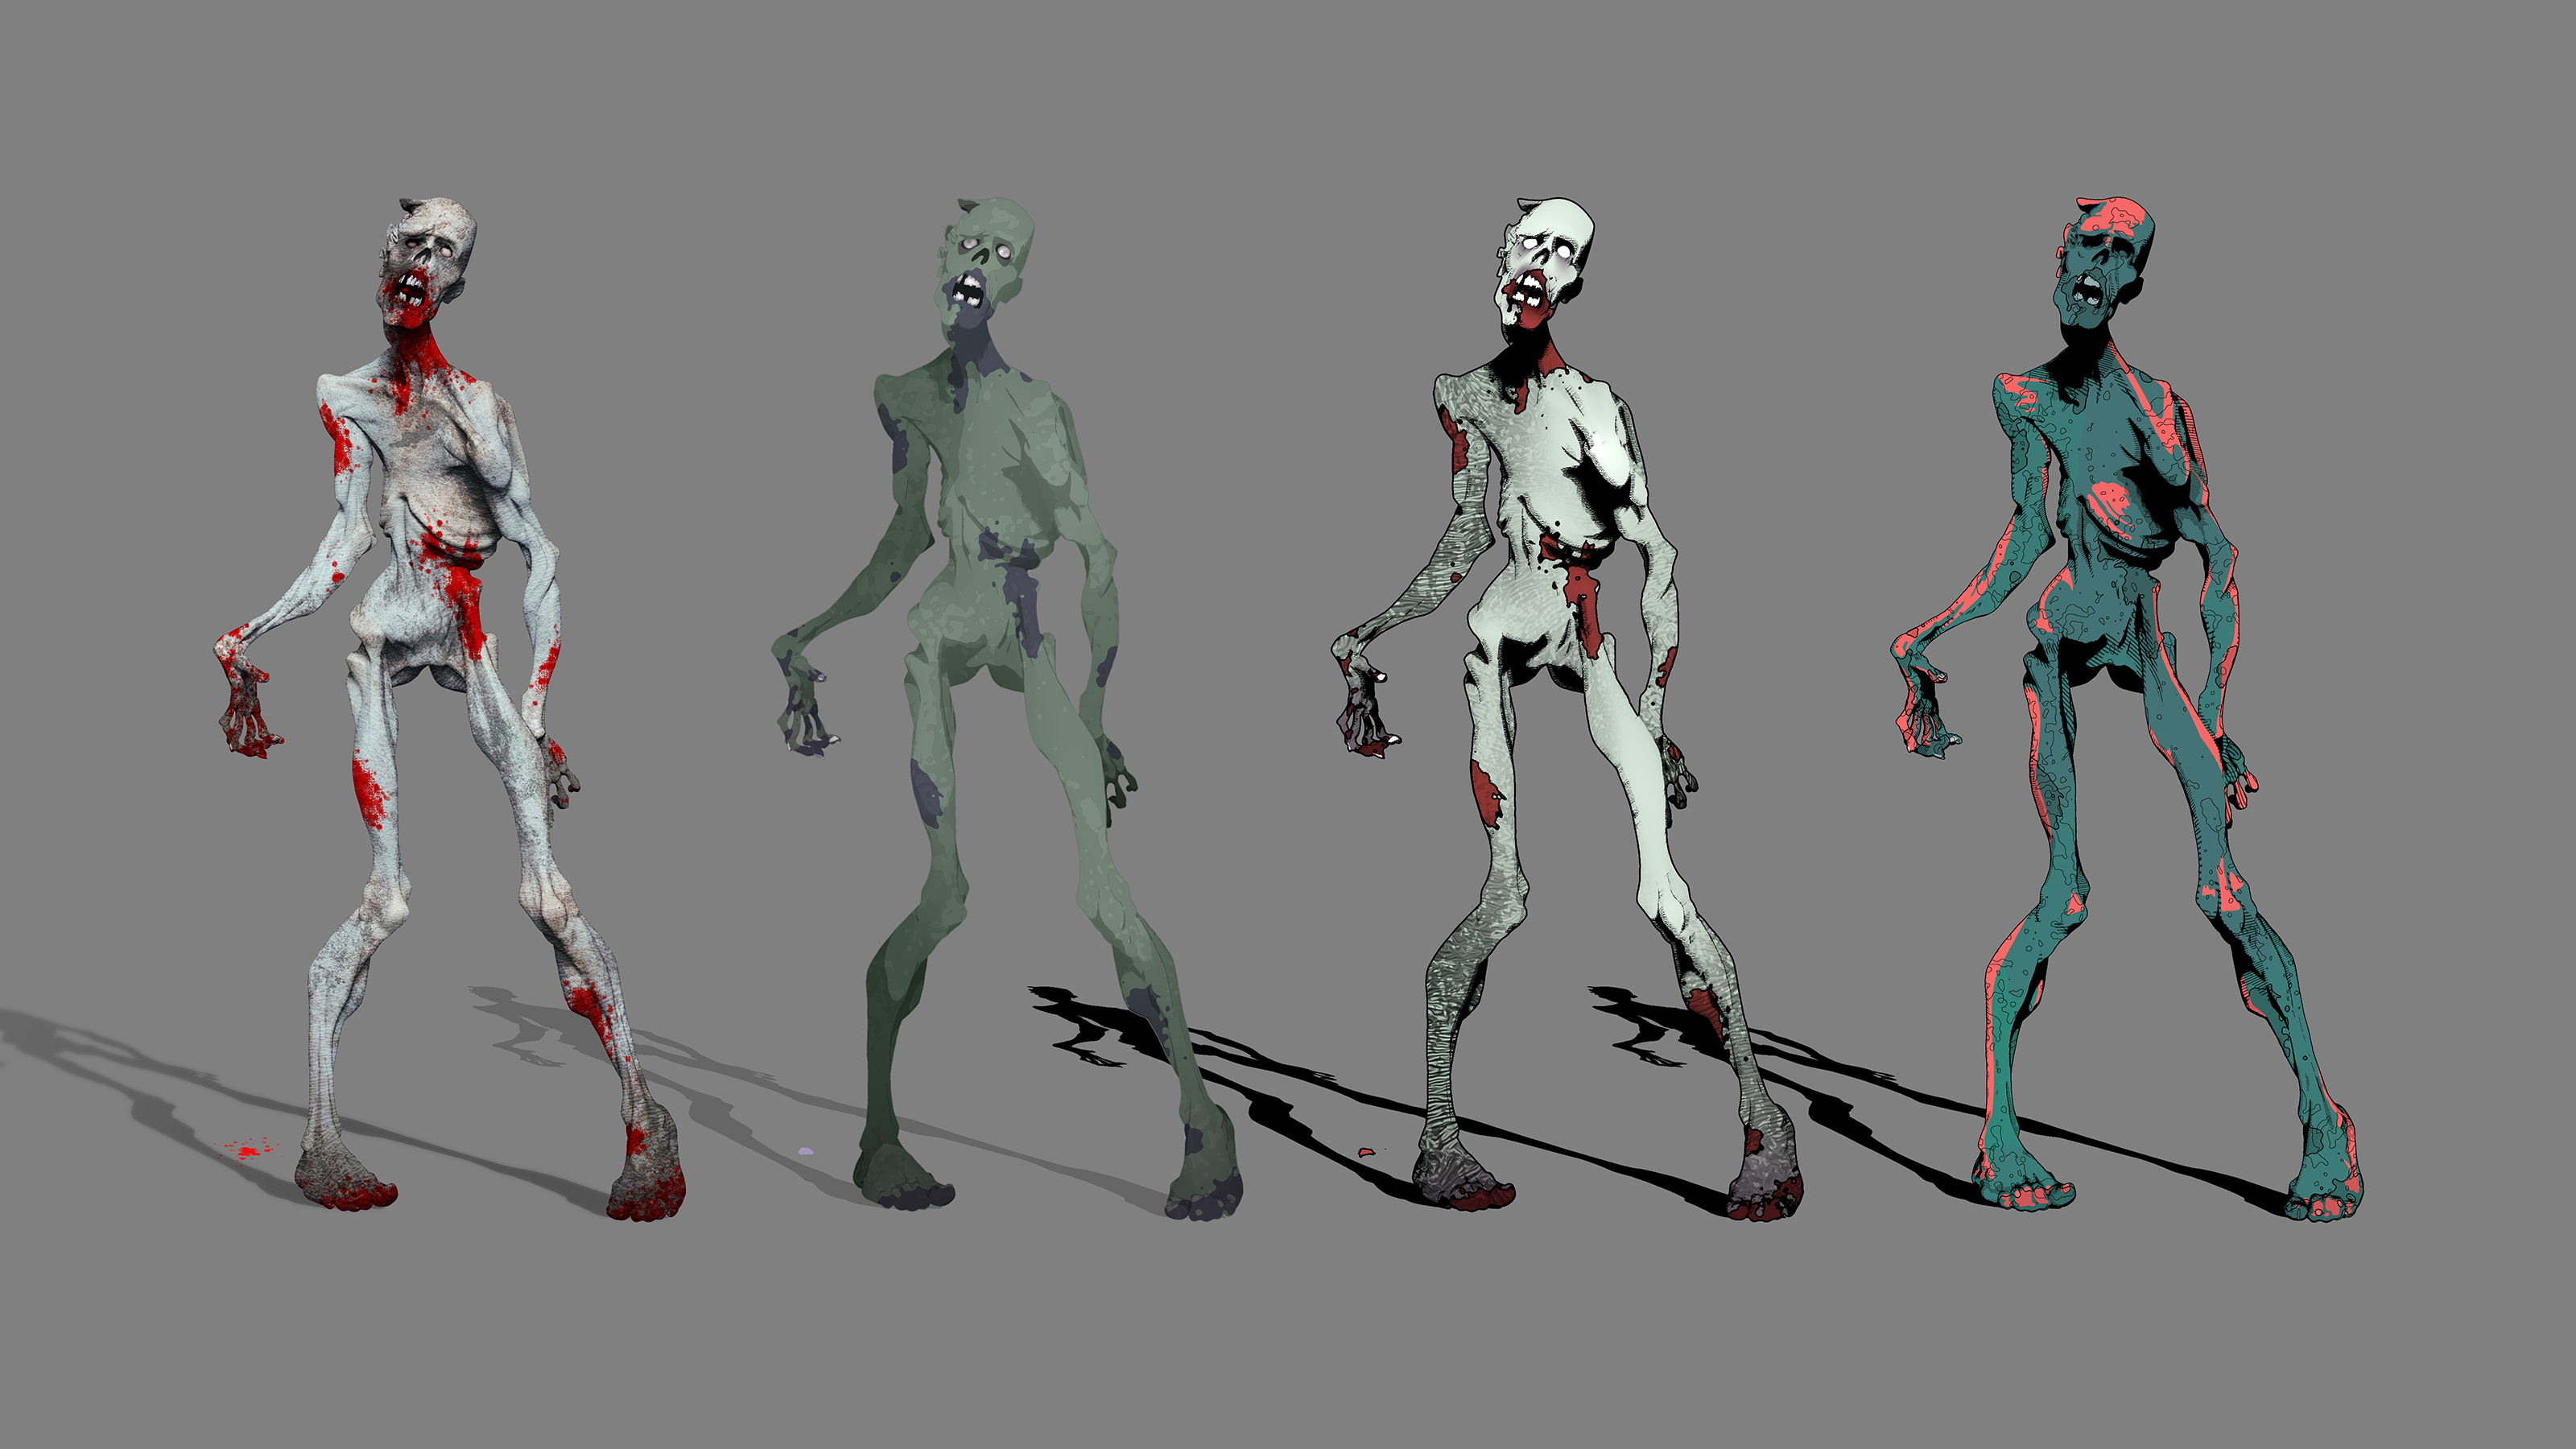
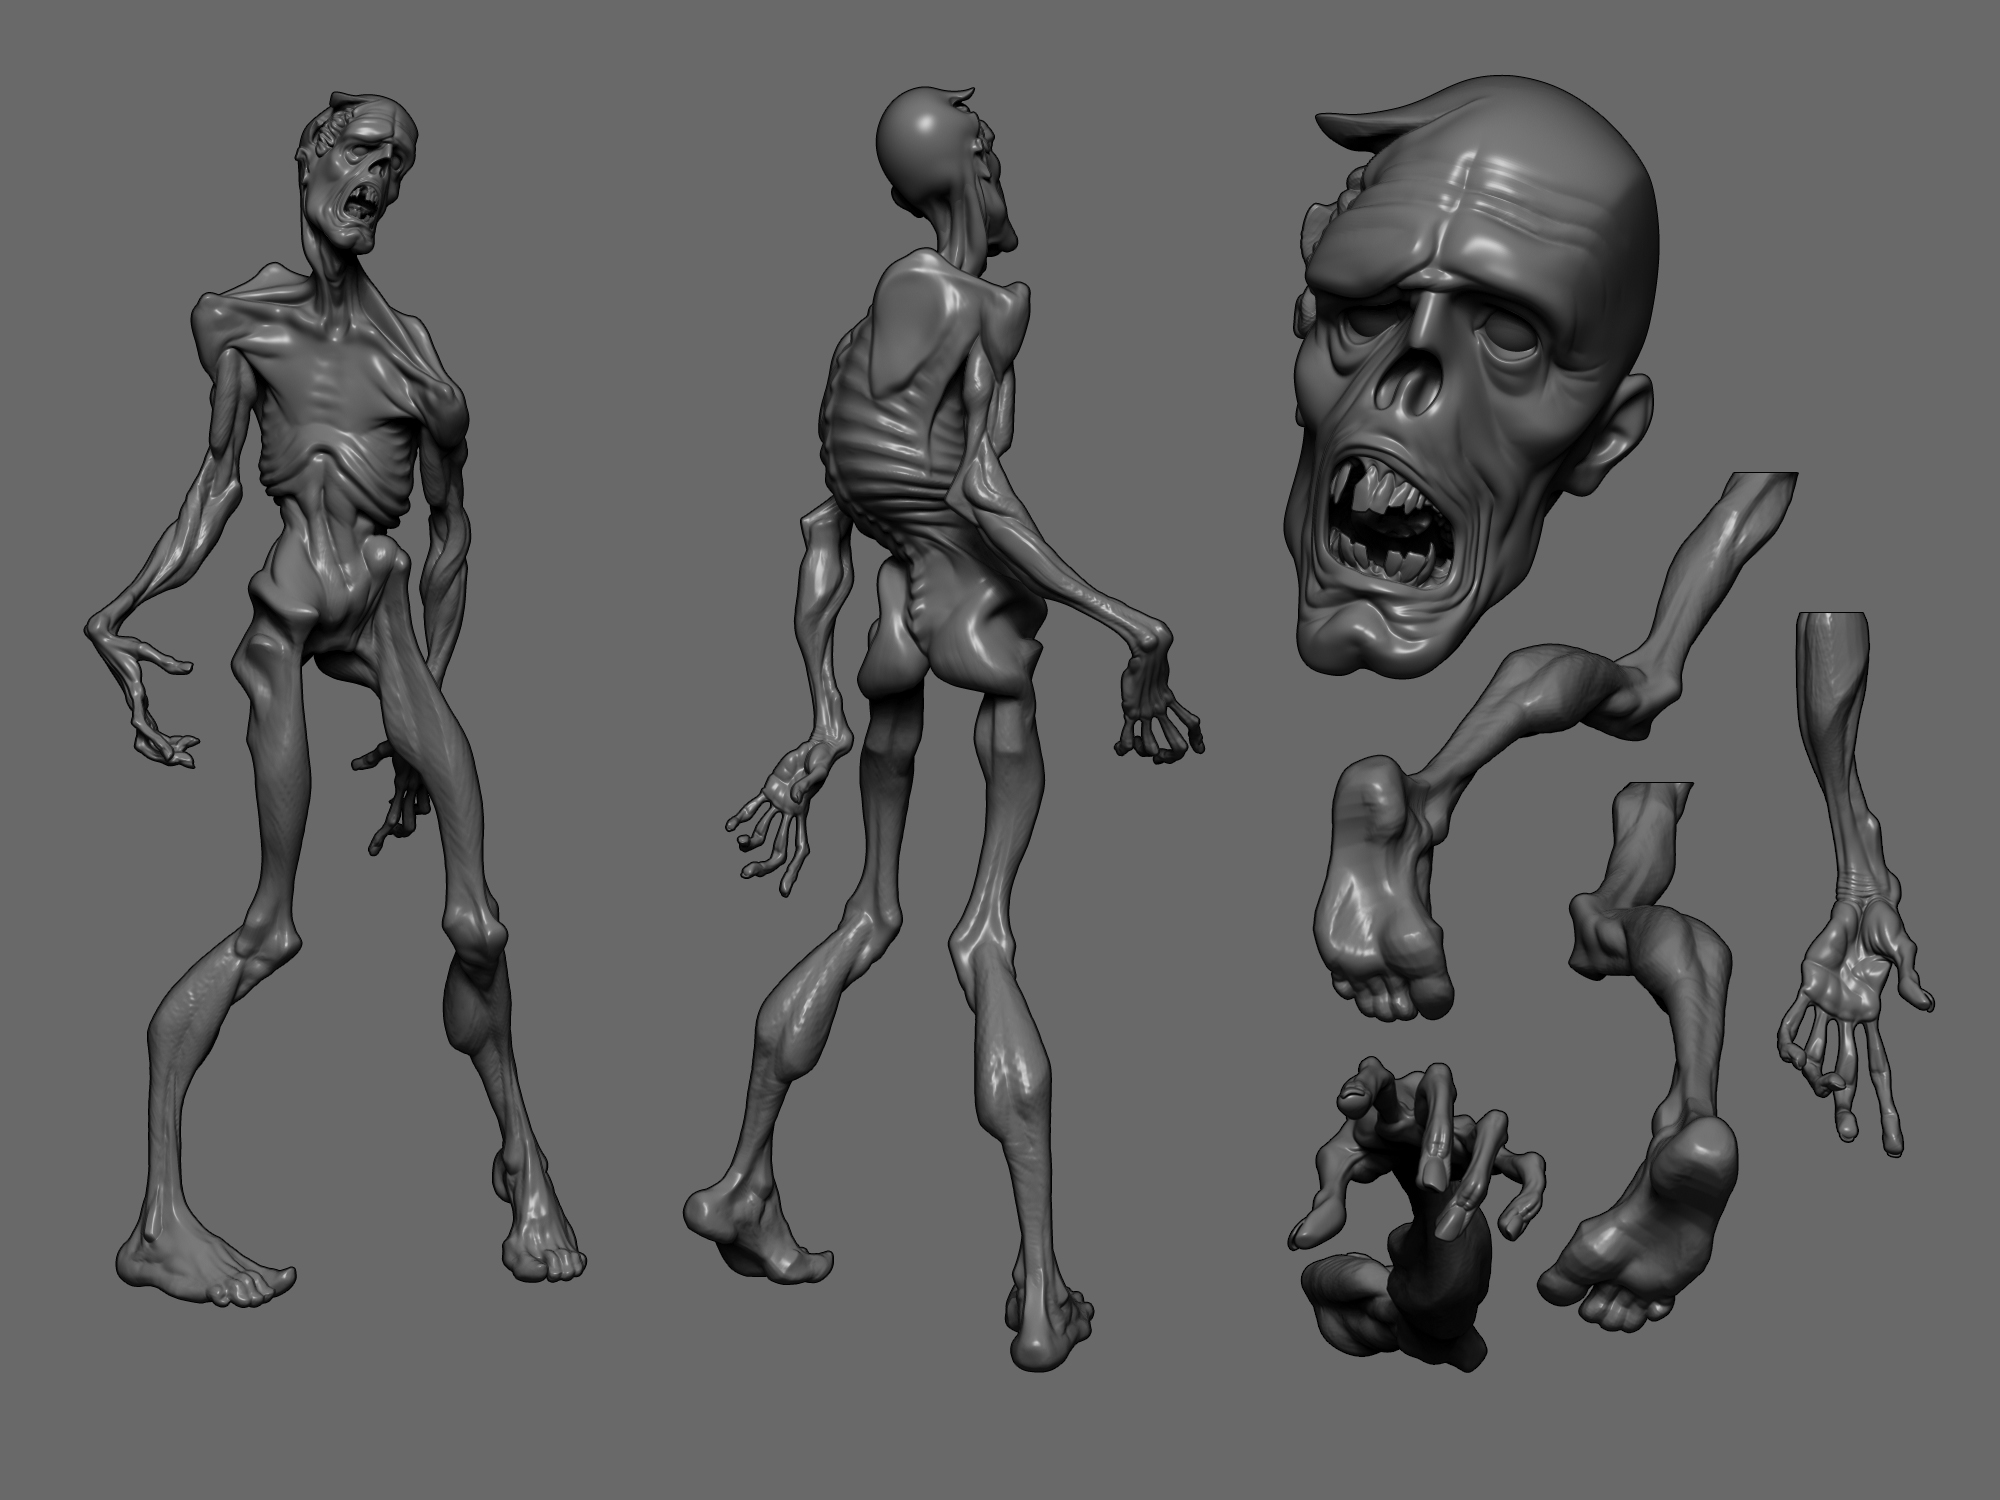
Zbrush Fun
Walker
Vis dev experiments and a conceptual sculpt for a personal project.
Lincoln, 1874.
A quick conceptual sculpt.

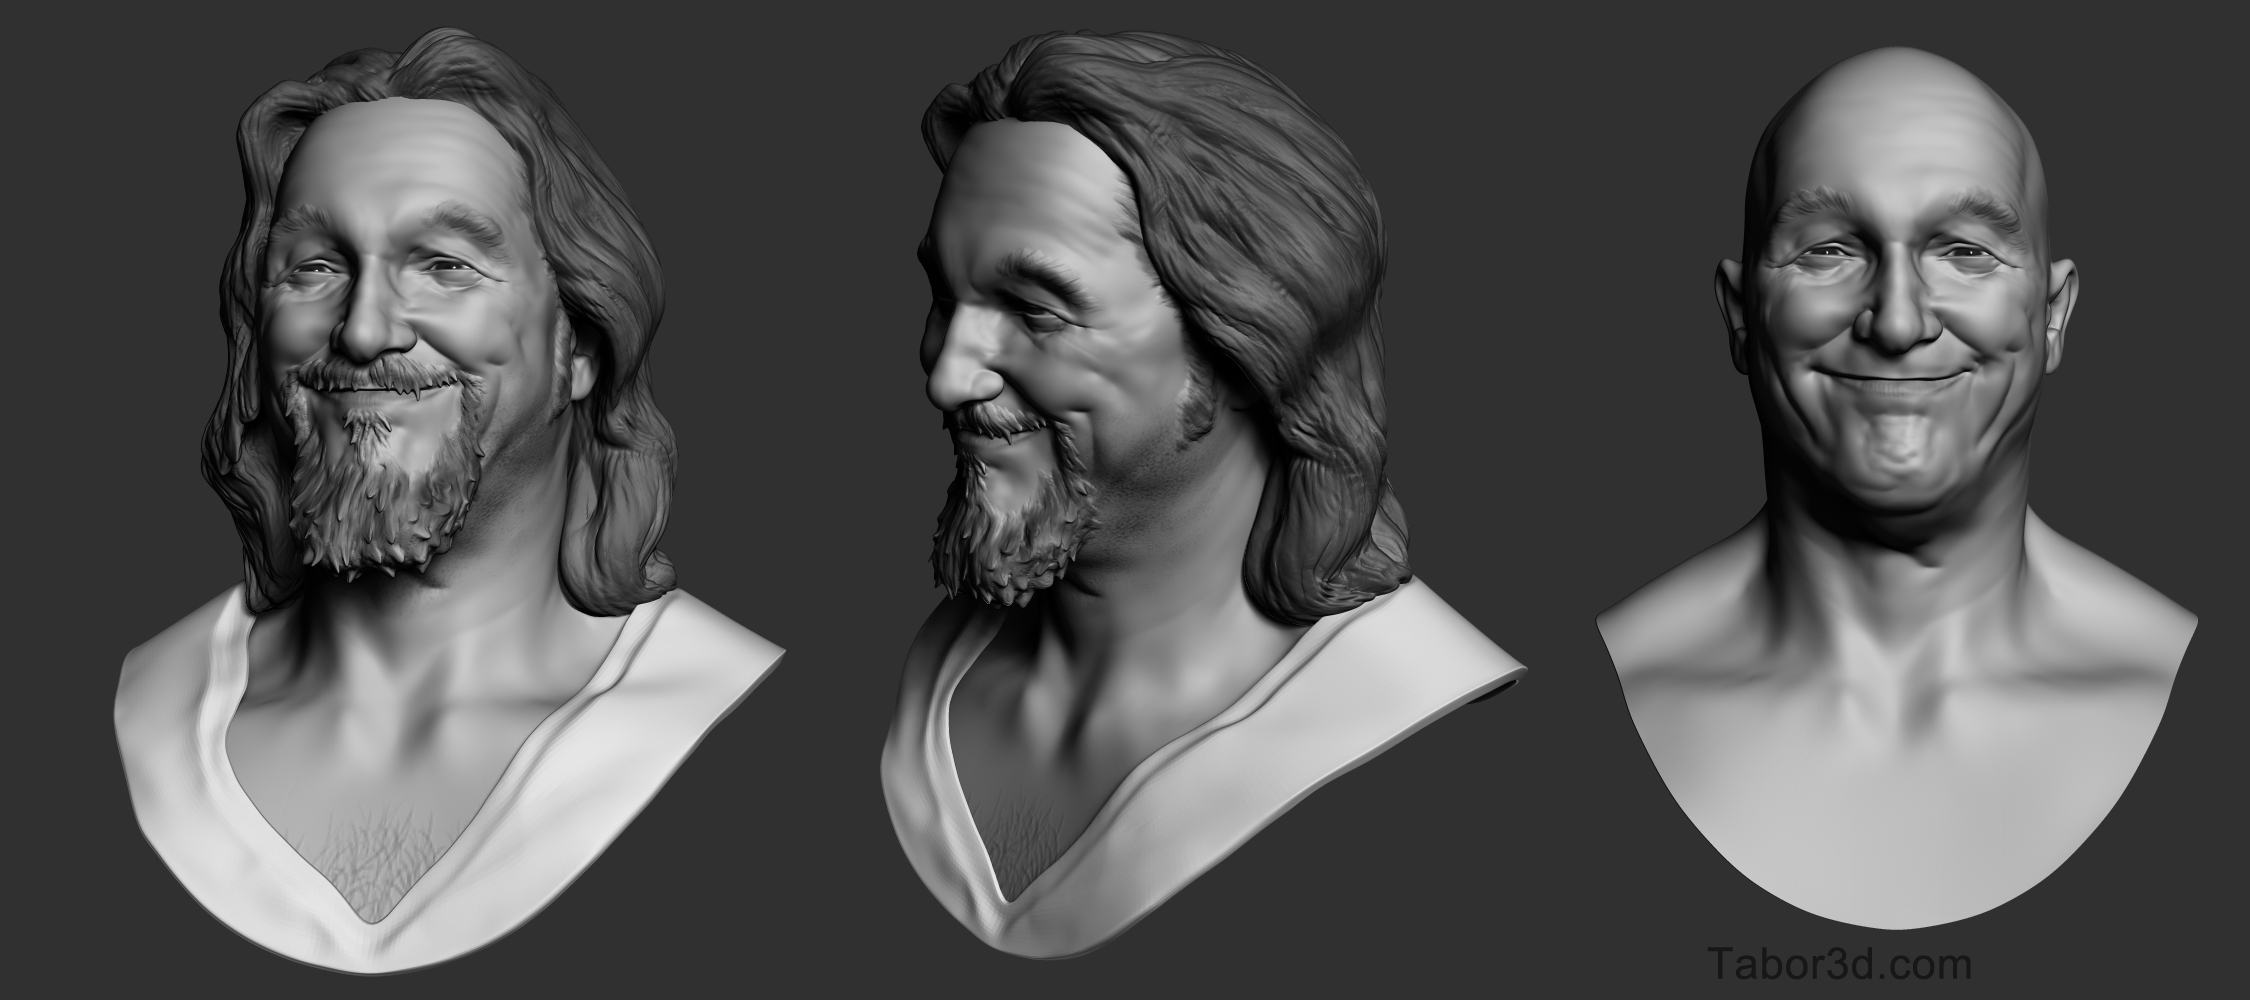
Lebowski Busts
Quick (< 8 hours) likeness studies from my favorite Movie.


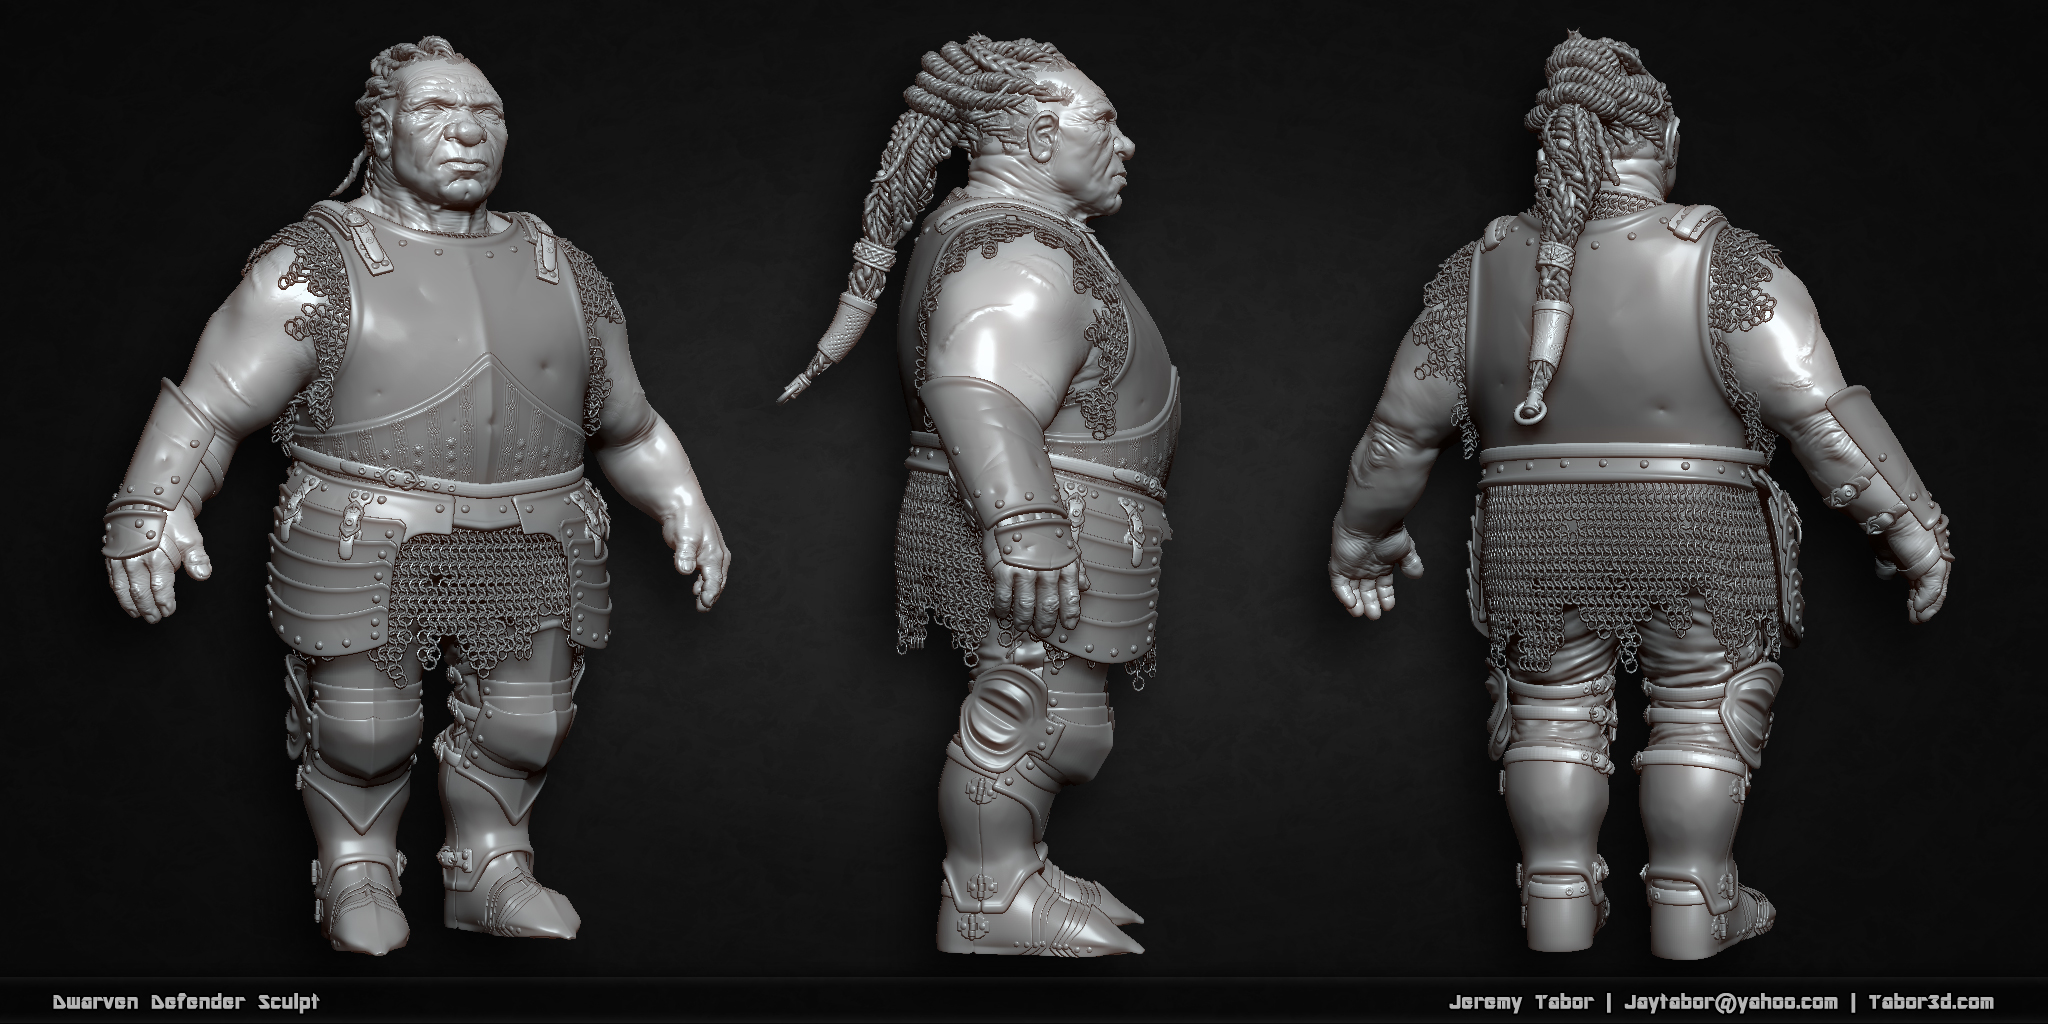
Dwarven Defender
An old DnD Character 😛